AI Production Workflow
Pacific Communications  ·  2025
TV
Topher Villan  ·  Art Direction

AI Video
Production
Workflow

4 steps
Concept to cut
Pacific Communications
Scroll to explore  ↓
01
Step 01
Claude

Build the
Hero
Reference

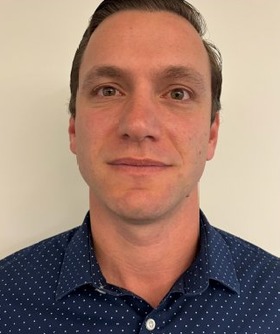
Everything starts with a hero reference image — a single locked visual of your character that every scene will be built from. Claude writes the prompt that creates it. My method is a 3-step brief: identify the goal, give Claude the context, tell it to solve it. Example — "I want to create a NanoBanano image prompt. You are an expert prompter — research how to best prompt for NanoBanano and build me a prompt for this specific character." Claude handles the research, the structure, and the output. Get this image right and the rest of the pipeline stays consistent.

Character reference Likeness locking Prompt precision Style baseline Scene consistency
Ref 1 Ref 2 Ref 3
+
Using the two uploaded reference images (front and profile), recreate the same man with identical facial features, bone structure, skin tone, and hairstyle, preserving his exact likeness with absolutely no changes to face, head shape, or hair. Dress him in the Captain America uniform from The Avengers, but reinterpret the suit with deep, cinematic purple hues replacing the traditional blue, while retaining realistic fabric weave, subtle armor paneling, stitching, battle scuffs, the star emblem, and muted red-white accent details. He is holding Captain America's iconic circular shield, redesigned to match the suit with coordinated purple metallic hues, brushed metal texture, concentric rings, realistic reflections, light battle wear, and correct physical scale and weight. Frame the image as a mid shot, waist-up, set during the Battle of New York at street level, with crumbling buildings, debris, smoke plumes, sparks, damaged vehicles, and atmospheric haze filling the background while remaining slightly out of focus for depth. Render as an ultra-realistic cinematic live-action movie still, featuring natural skin texture, visible pores, realistic hair detail, shallow depth of field, dramatic but grounded Marvel-style lighting, high contrast, physically accurate shadows, and polished Hollywood realism, with no stylization, exaggeration, or cartoon effects.
↓   output
Generated output
02
Step 02
Higgsfield  ·  NanoBanano Pro

Generate the
First Frame

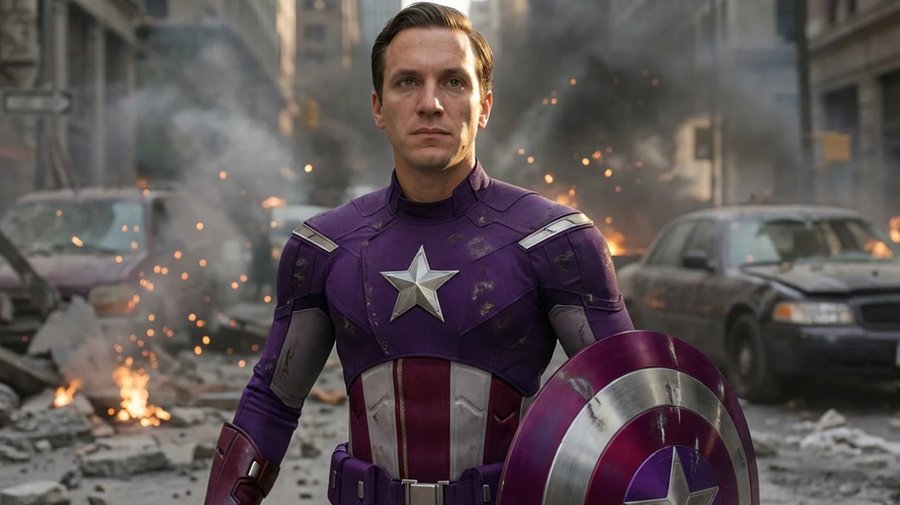
The hero reference from Step 1 feeds directly into Higgsfield as the main reference image. Write a scene prompt with Claude — new environment, new framing, same character — and NanoBanano Pro generates the first frame of that scene. This frame is what goes into Kling. Get the composition and lighting right here before any motion gets added.

NanoBanano Pro Hero ref input First frame Scene composition Kling-ready
Character reference from Step 1
+
Using the uploaded reference image, recreate the same person with identical facial features, head shape, proportions, skin tone, hairstyle, and expression range. Preserve their exact likeness with no reinterpretation or beautification. The person must be wearing the exact same clothing, colors, materials, fit, and accessories as shown in the uploaded reference image. Do not change, redesign, or substitute the outfit in any way — this is critical. Place this person inside a crowded glass elevator with transparent walls, allowing a clear view of the outside environment in daylight. Through the glass, a bright daytime city exterior is visible, softly defocused, reinforcing height and realism. The camera is at eye level, framed as a cinematic close-up from the shoulders up. The subject's face is in sharp focus, while a foreground figure is heavily out of focus, partially blocking part of the frame to create strong depth and a realistic, confined feeling. The subject has a serious, focused expression, eyes glancing slightly to the side as if confirming something important. Other passengers fill the background, softly blurred, creating tension. Lighting is natural and cinematic, motivated by daylight streaming through the glass elevator, with soft directional light shaping the face, realistic skin texture, and gentle shadow falloff. Shot as live-action cinema, as if captured on 35mm film, with shallow depth of field, organic contrast, subtle film grain, and natural color tones. Photorealistic movie still. No illustration, no animation look, no stylization, no CGI appearance.
↓   output
Higgsfield scene output
03
Step 03
Kling 2.5 Turbo

Animate the
First Frame

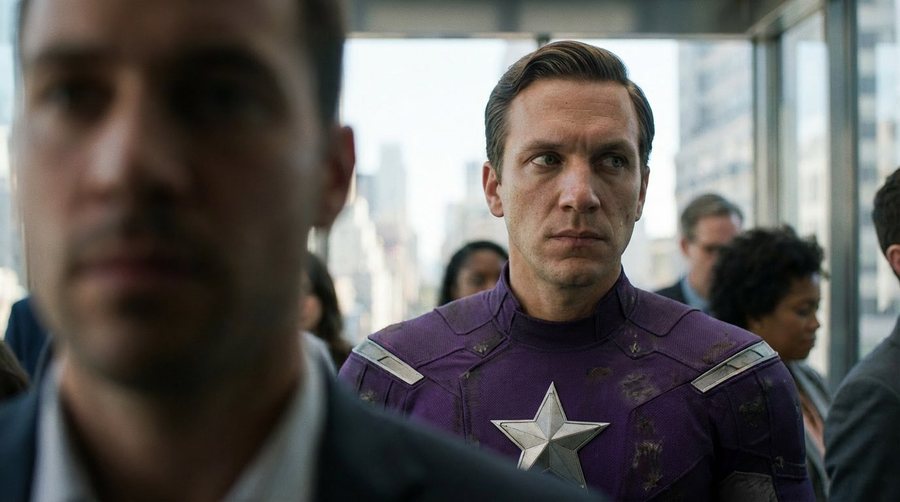
The first frame from Step 2 uploads into Kling 2.5 Turbo as the reference. Claude writes the motion prompt — subject movement, camera behavior, timing, atmosphere — the same way it wrote the image prompt. Kling animates the still into a cinematic clip with the character's likeness fully intact. This clip goes straight into Premiere.

Kling 2.5 Turbo Claude motion prompt First frame in Motion clip out Premiere-ready
Higgsfield output — Step 2
+
The subject slowly turns their head from a slight left glance back to center, eyes locking forward with quiet intensity. Movement is minimal and controlled — no sudden motion. The foreground figure remains static and out of focus throughout. Background passengers shift subtly, reinforcing the confined, tense atmosphere of the elevator. Natural light from the glass walls shifts slightly as if the elevator is in motion — a soft, gradual brightening across the subject's face. Hold the shallow depth of field and film grain throughout. Camera is locked, no movement. Duration 4-6 seconds. Photorealistic. No morphing, no stylization, no transitions.
↓   video output
Kling 2.5 Turbo output
06
Step 06  ·  Final
Adobe Premiere Pro

Sound Design
& Edit

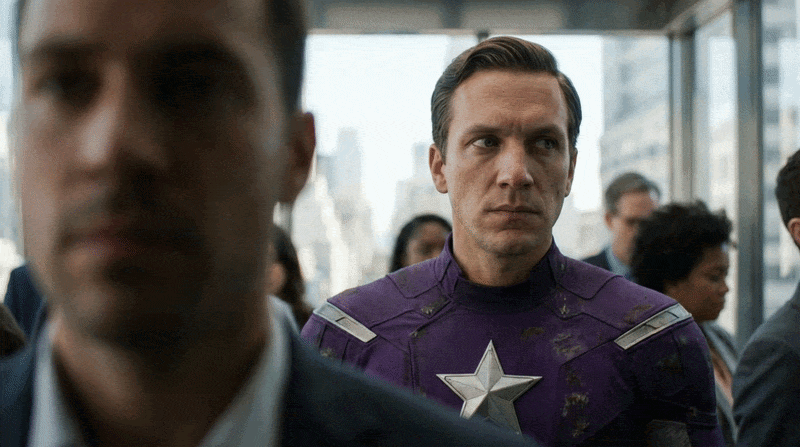
The Kling motion clip comes into Premiere for the final pass. Sound design, music, color grade, pacing — this is where the clip becomes a finished piece. The before and after below show exactly what that transformation looks like from raw Kling output to final cut.

Sound design Music Color grade Kling clip in Final cut out
Before
Raw Kling output
After
Final cut
Intro